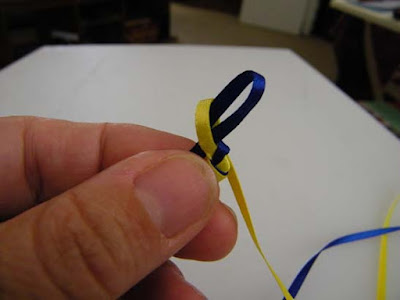
Tie a simple overhand knot about two inches from the end.
The blue ribbon is on top in this case and the yellow is behind.
Make a loop with the yellow towards the back. Remember that this is probably the hardest part of the whole process... getting the first two loops to work nice together so they stay snug.
 Wrap the blue ribbon to the right and back around the base of the yellow loop so the blue is now on the left.
Now you make a loop with the blue, with the loose end on the back side.
Bend the blue loop so that it slips into the yellow loop. Before you snug it up, be sure there are no twists in either ribbon. Pull gently on the yellow ribbon to snug it around the base of the blue loop.
After you snug the yellow around the blue, make a loop with the blue and slip it through the yellow and repeat this process until you have the desired length.
You are always going to bring up a loop from the contrasting ribbon through the loop.
When you have only an inch or so done, you can see if you have the pattern going. It should lay flat and have a uniform tension. With practice it works pretty smooth.
For reference I have included one more image of the back side of the ribbon lanyard. There is a definite front and back. If you put your project down before you are done, when you pick it up to work with it again, be sure the loose ends are coming from the front of the work.
There may be other ways to end it off, but when I have mine as long as I want it, I cut the ribbons and run the end through the last loop before I tie a knot on the end. I then take the two ends of the lanyard and tie another knot... of course that would be after I have put my scissors on the lanyard.
Good luck with your lanyard. If you have any questions, leave a comment and I will try to respond quickly.


This looks like one of those great rainy day projects I could show my school agers during naptime this summer. Thanks for sharing! I'll send you pics of results!
ReplyDeleteI would love to see pictures of how you end it off. I am having a really tough time getting mine to look nice :(
ReplyDelete