Thursday, December 29, 2011

Another year just around the corner


It is hard to believe that 2012 is just a couple days away.  So much has transpired in the last 12 months, it is hard to sit back and remember everything, although many of them were posted here on my blog.  I have been so involved with projects and such that I have not been here to update with anything new lately... that is since my "new kitchen".  Well, it got even better the week after my last post... I got a new stove.  It wasn't just a new stove, it has a smooth top, and a dual oven with convection in both ovens... I was afraid I would have to learn how to cook all over again, but I am finding it isn't such a big deal to learn how to use the convection oven.  I think with a little practice I could get pretty good at this. 

It has been a while since I really spent alot of time in the kitchen, but I am really enjoying getting back into the baking scene.  This is a raspberry cobbler that I adapted from my peach cobbler recipe. I thought it looked pretty when it came out of the oven. 

I made some oatmeal cookies and thought I would try putting 3 sheets of cookies in the convection oven at the same time.  What I had read said they would all bake evenly because of the circulating heat.  They all turned out awesome.  My husband isn't complaining.  I even made him a pie the other day... did I say he has a sweet tooth.


It is quite likely I will be sharing a few of my recipes in the weeks ahead as I get more comfortable with all my new toys in the kitchen.  All this has given me renewed energy to get creative in the kitchen.

It has been a couple years, maybe more, since my Christmas cactus has blossomed.  I have two, and they both have been loaded this year. 


The last picture here is a foggy morning last week and I thought it would make a cool picture the way the trees were peeking through.


Sunday, November 20, 2011

Kitchen Delight

It isn't every day that I can come up with new pictures, but I just had to take some pictures of my new kitchen. We talked alot about a new addition we were going to put on the garage to give me more room for my quilting frame.  By the time we got back from Arizona we had talked ourselves out of an addition to the garage.  I then made a proposal to Ron... seeing that I saved us the cost of the new addition, I think it is a small consolation to upgrade the kitchen.  He had no objections... but of course I kept my requests reasonable.
First I wanted a new range hood.  The old one just never did a good job of pulling any air up the vent.  New one is stainless steel and has a great fan and extremely good lighting.  Next item was the removal of the microwave from the counter, down there on the left under the kitties.  I moved my mixer out there where it is easier to access.  Microwave got moved into a cupboard on the other side of the room that was built with the intention of putting  a microwave in it.  We were convinced our microwave was too big for the space... it fit just fine.


You can see the microwave in the upper right of this picture.  The next on my agenda was a kitchen island.  I don't have a very big kitchen, so my island is of modest size, but it sure is a beautiful addition to my kitchen.  The table that used to be there in front of the window only collected mail.  We typically eat at the dining room table. 

This island is actually a cart... it has heavy duty casters that make it easy to move to where you need it.  Like Friday morning we made peanut butter sandwiches to take to church for the "Take It To The Street" ministry.  We rolled the island out a bit and we worked from both sides of the counter space.  So much easier than standing side by side to do the same task.

Last, but certainly not least I wanted a new sink with a fancy new faucet.  The sink is granite composite and the color is Espresso.  The faucet has copper hi-lites.  The deep sink is a single basin, but it has a raised shelf on one side where I will put a stainless steel dish drainer that is narrow and intended for smaller spaces.  The drainer hasn't arrived yet.

For a finishing touch, I decided the backsplash behind the sink was a little plain... it needed to be spiced up.  The image here shows the tiles I started out with on the top row.  We have had the bucket of blank tiles for years now, just waiting for the right project.  I used Mod Podge to cover the tile with fabric that I bought in Arizona.  Right now they are just resting in place behind the sink, but Ron will put a shiny finish on them before he adheres them in place.


I know there are lots of bigger, more beautiful kitchens out there, but I could not be happier with my new expanded kitchen.  It really is the same size it was, it just seems like it grew a whole lot.  It is just gorgeous, and we didn't spend an arm and a leg.

Sunday, November 6, 2011

Spending time in Arizona

We have been away from home for a week now, and it sure would be nice to be heading back home.  We are still awaiting the arrival of new grand-baby.  I have totally enjoyed spending time with my DIL and the whole family, but we have been in the house alot since we have been here.  As a result of having alot of  "free" time here, I have completed a few projects.  There was a mystery quilt I had been working on for a few weeks and the last step was released the Friday before we left.

The instructions were to add narrow sashing strips with cornerstones.  I didn't care for that option, so I decided to add the gold squares, which meant I had added more Y seams than I wanted to count.  I had a couple of fabrics with me that I had planned on using for the borders, but the two narrow borders were purchased at a quilt shop that is just down the road from here.  My DIL is not a quilter, but she really enjoys going to the quilt shops with me.

The next project I jumped into was the Fiesta quilt kit I brought with me to finish for my DIL.  Grandson's birthday was this week, so I had some curly ribbon at my disposal when it came time to add embellishments.  Most of my quilting has been done on my Featherweight that I brought with me, but I did use my DIL's machine for the zig-zag around the applique pieces.  Considering that she does not really spend a whole lot of time sewing, she has a very basic machine, and that works just fine for her... but it does do zig-zag. 

We have had the opportunity to do things with our grandson.  Makes you realize how much you miss by living so far away.  I am famous for finding projects to work with the younger set.

 GS and I made a necklace for his Mom.  She was very pleased with her gift, and he was excited to see her reaction.
While his Mom and Dad were out, GS and I were really busy.  Besides the necklace we made a wreath.  He poked most of the fabric squares into the straw wreath, but I think it turned out pretty cool.


 Did I say that I know where JoAnn's is here and I have already been there three times this week?  Last trip was this afternoon.  My husband and I decided we needed to get out of the house by ourselves and went back to JoAnn's and bought some candles for the fireplace.  My DIL was overjoyed at how neat it made her fireplace look.  I had seen it at a friend's house and told her about it.  The banjo on the side was a gift from grandpa to the birthday boy.  We will have to see if he will keep practicing once we leave.  He says he will play a song or two for us the next time we come.  Grandpa has had this banjo for 35+ years. 

Monday, October 10, 2011

Productive Monday

Monday is typically our quilting day at church, but when the church office is closed, we cannot have quilting either.  That is OK though, sometimes it is good to have a "free" day.  I took the opportunity to finish a couple UFO's.  I started a rag quilt for one of my grandsons last week.  I had flannel shirts and jeans already washed and waiting for a reason to make one of these quilts again.  It is an extremely easy quilt to make, but it is hard on your hands when it comes time to "rag" the quilt.  For that reason, I have done this one in stages.  I finished putting together the squares for the second half of the quilt  on Saturday, and did some of the rag cutting, but my hands gave out.  This morning I decided it was a good project to get done.  One of the things I like to do on these jean quilts is to add lots of the character of the jeans, like pockets, plackets and even repaired holes. I also patch together smaller pieces to add extra "rag" lines. The problem with the added "rag" lines is the additional pain your hands need to endure... but I still like how it finishes the look.

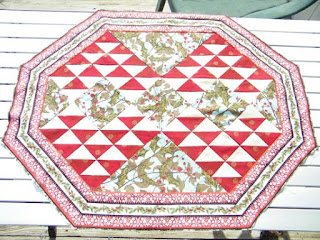
Several weeks ago I started a mystery quilt, that is I gave the first week's instructions to several of the ladies in my two quilt groups.  Only a couple ladies have actually done anything with this Christmas table runner, but with it being my idea, I thought I should make one ahead of handing out each new set of instructions.  I was probably at the 4th set of instructions when I put my pieces on my design wall.  My husband is always ready to critique what I am doing, and often he comes up with some pretty good ideas.  He started moving the pieces around and came up with a totally different looking table runner.  It looked more like a table topper than a runner, but I really liked the new layout.  The original table runner was a rectangle, not very exciting.  I had border fabric already, but with the new layout I had to tackle mitered corners.  Having a border print really added to the complexity.  I have done many a mitered corner, but I don't remember doing one with a border print.  There may be an easier way to do this, but I had to do alot of manipulating of the angles to get the inside border to line up correctly.  Now the table topper needs to be quilted and bound, but the piecing of the topper is done.

Third finish for the day was the quilt I was quilting for a friend.  It has been on the frame for about a week.  Some of the quilting I do allows me to sit most of the time, but this one was one that I had to stand up all the time, so I had to limit how long I could work on it at one time.  Just before supper I finished the last pass and was able to take it off the frame.  My friend will be happy, I have had her quilt for several weeks.

It looks like the new fishing boat that my husband bought a couple weeks ago is ready for a test run.  May not get any fishing done, but tomorrow we will put her in the water and see if we can cruise around a little.  If all looks good, next time we may take fishing poles with us.  We already bought our first Texas fishing license, so we are ready.

Saturday, October 8, 2011

Beautiful cooler mornings

I had a great idea a couple weeks ago, I thought it would be neat to have our breakfast out on the deck, seeing that the temperature has come down a little.  The mornings have been really beautiful.    Although the 100 degree days seem to be pretty much gone, it still can get pretty warm in the afternoon.


Even the cats think it is pretty nice out there. They really know how to make themselves comfortable.
 The colors on the bushes across the front of the deck are still in full bloom.  The Esperanza is native to this area and we have several bushes that stay full of blooms way into November. 
 

As for the quilting front, one of the projects I have been working on is a Mystery Quilt.  Friday was when Step 3 was released.  These are my finished strips.  Now it will be almost a whole week before I know what comes next.

Wednesday, September 28, 2011

Country Cousins quilt is on display

It was a great day today... my Country Cousins quilt is hanging on the wall in our living room.  We moved a couple pictures and found an almost perfect spot.  There is a chair and lamp in front, but it really doesn't hide much.  Wall space comes at a premium at our house.  It gives the living room a whole new look.

We are still needing rain and the 100 degree days have not gone away yet.  One of these days when it cools down a little, maybe we can get some of the projects done that requires being outside for very long.

Friday, September 16, 2011

Two UFOs completed

Does anyone know where this picture was taken?  There should be a few quilters out there who know, and there is a bit of history represented here.


A couple hints, we crossed these two bridges that are not too far from each other, and they were near the end of our trip to this town in Kentucky that we visited last week.


Back to quilting... If I could count the quilt top I finished this afternoon, I could actually chalk up three completed UFOs this week.  My Country Cousins quilt is totally done, but I did not have a good way to display it, so I do not have that picture just yet.  I have a pole setup that I can raise up on pulleys between the house and garage.  The last time I hung up a quilt the ropes fell apart as I lowered the quilt... the sun had baked the ropes to a crisp... remembering those two months of 100 degree days.  My husband replaced those ropes this afternoon, but he advised waiting until morning to raise a quilt for a picture as the wind would have caused an issue.
The first quilt I completed this week was my Country Cousins quilt.  I made it a quilt-as-you-go project, so once I had the last border attached I only had the binding left to do.  Well I finished the hand work on the last  two border pieces while on our trip last week.  I couldn't wait to get home and attach these two borders so that I could bind this quilt. It's really neat and can't wait to get some good pictures.

Next quilt I had finished piecing before we left on our trip, but I had decided to use a high loft batting to give the quilt a puffy look, so I waited until we got back so I could get the right batting... there was a super big roll at church that we are trying to get rid of at quilting.  The cool part about this quilt is I got my husband to do a few passes on the quilting phase... so he had a hand in getting this one done.  I did the quilting on this one using pattern boards that a stylus follows, so you really can't mess it up.  Quilting on a frame can look very intimidating, and I am pleased that he is willing to give it a shot now and then.  Didn't he do a great job?


The last quilt I finished piecing the top and added both of the borders, but it has not been quilted yet... a quilt isn't really complete until it is quilted with binding in place.  I still think it is OK to consider it as being done, at least this stage, because more often than not you have put alot of work into these masterpieces even without considering the quilting.  The special part of this quilt top is the mitered corners on the outside border.  It is a first for me. I looked at the stripe on the batik border fabric I found for the border and I could not justify doing it any other way.  By the way, this quilt is from a "class" I am taking that isn't finished yet.  The last block you see in the corner here will not even be introduced until next Saturday.  The picture we were given at the start of the class showed all the blocks and I found these blocks in EQ.  Right now the quilt is 86" square and I have not decided on which fabric I will use for the binding.

OK,  I know you were in such suspense.  The picture at the start of this post was taken pretty much while I was standing in the same spot... I just turned around and took a couple steps.  For those who have not been there, this picture was taken in Paducah, Kentucky.  I didn't get to spend a whole lot of time in Paducah... it was just a side trip on our way to Ohio, but I was able to squeeze in a shopping expedition to Hancocks of Paducah.  Of course you couldn't pass the opportunity to visit the National Quilt Museum.  My husband does not spoil me.

Saturday, September 3, 2011

September and still over 100


My weatherman husband has told me more than once there is going to be a change at the end of the week... he just didn't tell which week and what kind of change.  It certainly hasn't cooled down any... but he did say there is going to be a change soon.  I guess that means sooner or later.  Meanwhile 100 + is the norm... every day, and has been since sometime in July I think.  Feels like an oven outside most of the time.

Back a few months ago, I think I just went to session number 5 of this 6 month, once a month quilt class.  I found out in the second session that the blocks for this quilt were all taken from the library files in EQ.  The quilt was to be made from Batiks and each person was to make their own choice for the background.  The picture of the example used a very dark batik that almost looked black.  I don't like working with black fabric.  It is difficult to see what you are working on sometimes.  After our first class where we were given the fabric for the first block, minus the background, we went out of the class and selected the fabric for our individual background.  I picked my background based on these first fabric pieces.
The upper right hand corner block is the final block, and there are only 4 of them. Three of the blocks in this quilt required 8 blocks of each.  I have one more to complete of this last one and I will be ready to sew on to the last strip for the bottom.  I showed the two border fabrics I found in a post I put out there back a couple weeks ago.  I did the first center block with the templates provided in the class, then I figured out the blocks were from EQ, so I printed paper piecing templates for the remaining blocks, except for the turquoise and lavender blocks which were just simple squares.  When I get on a roll, it is hard to slow me down.  The last block that is the corner block shown above is not even going to be given to us until the next class at the end of September.  I anticipate having the borders on before then, so I might end up not going to the last class.  I'm hoping the borders will improve the looks of this quilt.  At this point I'm not real impressed with how this is turning out.  The blocks and colors don't seem to make a good presentation.  I have had to fill in with shortages in the fabric provided in the class, but mostly the choices were made for me.  The only difference I have made is my choice of background.


Friday, September 2, 2011

Ribbon Lanyard... add on

Back a while ago I posted a tutorial on how to make a ribbon lanyard... something I find very necessary to keep my scissors handy.  The original post for this tutorial was a year ago in May, so you will have to go to the archive files for May of 2010.  I've made several over the years, but you can always learn something new.  I had a request to show some pictures of the way that I tie the ends when I am done looping.  Well, in order to show the end, I needed to make a new lanyard so I could take the missing pictures.  I always seem to get a little frustrated with how I start... you tie a knot on one end and you have two spools of ribbon on the other... and where is the starting loop to come from? Today when I sat down to start my new lanyard I decided to take some pictures at the start also.


In the first picture it shows the green with a loop in it under the straight piece of purple.  With the two ends together, take the ends under and come up around and down into the loop formed by the green and purple ribbon (not the bigger green loop showing on the right). Pull the ends through and finish the knot.  Give a little tug to tighten.  You now have your beginning loop on the right.  Maneuver the two ribbons into position.
 
 
The purple ribbon needs to come around to the left to begin the looping.  Proceed to the previous tutorial to work through the lanyard to the point it is ready to be tied off.


Finishing off the ends

 Cut the ends leaving 3 or 4 inches to give yourself room to tie off the ends properly.  Take the opposite ribbon end and thread it through the last loop.  Pull ends to snug, then tie a simple overhand knot.  It may take a little maneuvering to get it close enough and to look nice.
 

In this image the short ribbon ends are from the start and the longer ribbons are at the finish.   On the right it shows my choice to tie my lanyard ends together using a square knot.  I also found that by using a wider ribbon the end result is the lanyard seems to have buoyancy... it stretches when I pull, then springs back when I let go.


.

Sunday, August 28, 2011

Quarter Trim Paper Piecing

How's that for a name?  I have been doing paper piecing for a while and I don't think I use all of any one technique.  I've put together a tutorial for my version of paper piecing and I thought I should give it a name.
These are the tools that I use for my paper piecing. 

A couple things I forgot to include in my tutorial is the settings on my sewing machine and the paper I use.
My machine defaults to 2.5 when I turn it on.  When I am doing paper piecing, I turn that down to 1.6.  At 1.6 my paper tears away easier and is still possible to rip it out with a seam ripper if I should make a mistake... no one makes any mistakes... Right!!! 
There are all kinds of paper out there for this purpose, but I use the common 20# paper that is used in most printers.  Once I am ready to rip the paper off the fabric, I fold on the stitch line and carefully pull to start the rip... most the time it rips off fairly easy.  Occasionally I might need to use a pin or tweezers to get out some little scraps of paper, but that is not the norm.  I recently found that I could print on paper from a doodle pad.  That is newsprint weight paper that is in a pad for kids to draw on.  It has to be trimmed to fit in the printer, but it does go through my printer fine.  I printed on this paper for a friend who wanted a lighter weight paper.  The doodle pad had 60 sheets and it cost $1.84... so it was pretty cheap.
Oh yes, I have to give you a link to the tutorial... Quarter Trim Paper Piecing
There is one other note I should make regarding how big to cut your fabric pieces.  You will typically have a little more waste with paper piecing because you want to have a little more than the 1/4" seam allowance on all sides of the piece, and making it even bigger is not an issue.  The area that I have the biggest issue with is triangles or angled cuts... sometimes when you flip the triangle over into place after you have sewn it down, it doesn't fit the way you thought... so it is worth double checking before you stitch triangle pieces down if you don't want to use your seam ripper.

Saturday, August 20, 2011

Needle trick

I guess it's not really a needle trick, but something I learned a while back that I think is a pretty neat way to bury those threads.  Could be most people know about this, but it is still worth sharing for those who do not.  When you are quilting, you typically draw your bobbin thread to the top when you start and stop.  This allows you to tie the ends to secure them, but then you have to "hide" the thread ends.  I have a needle threaded ready and waiting to do just that... bury the thread.  I use a thread that is a little heavier than some of the thread I use for quilting, but not so heavy that is will make a big hole.  I probably cut about a 12 to 15" piece and fold it in half and thread the looped end through a large eyed needle... not too large though.  I put the needle point in close to the base of the tied ends and direct the needle in a clear path... maybe an inch, under the fabric but not through to the back.  The needle in the picture is just laying there so you can see the loop good.  After the needle is inserted, I position the loop over the insertion point and pull the loose ends of the thread up through the loop with my fingers.  Holding the loose ends securely, I pull the needle out the other end and continue to pull... releasing the thread so the ends come out the other hole.  I don't like to stop and start any more than necessary, but this little trick makes a nice clean finish, quickly.

This quilt is not a quilt that I pieced, and the border was actually hand appliqued, but my friend wanted me to quilt it.  This is part of the border... I chose not to show the whole quilt with it not really being my quilt, but this was the part I liked the best and I wanted to share.  It was my husband's suggestion to echo the elements in the border.  I meandered on the blocks.  He often gives me good feedback when I ask for an opinion of what I should do.  Sometimes he shakes his head and says I don't have a clue, but this one he was pretty sure it would look good echoed.  I think he gave me good advice.  I was very pleased with the thread I found to use. The variegated red/yellow blended in nicely on the border.  I changed the thread when I meandered on the blocks to an off white on top as I thought the red would have been too high of a contrast. The blocks were retro little children playing.

I am in the process of echoing the elements of the border on my hand applique quilt that I have been working on for a while.  I have the hand quilting for twoof the borders done and I actually attached these side borders using my QAYG technique.  Couldn't wait to get all four borders done because I wasn't sure how the QAYG was going to work with the borders.  Pretty slick how it is turning out.  Hand quilting takes a long time, but I am on a roll and really anxious to get it done.  I didn't post a new picture because it looks kind of funny with just the side borders attached, but I will get the next two borders done and a new picture posted... very soon I hope.

Saturday, August 13, 2011

Another WIP - start of a new quilt


I really have no real count of the works I have in progress, so adding one more really does not matter a whole lot.  It is nice to occasionally finish one, so starting this one is going to be a good thing because I have a target date that has already been established.  New grand-baby will be here in November.  When we were visiting earlier this summer, my DIL and I went shopping and bought the fabric she would like me to use in the quilt I will be making.  I have been trying to find the right pattern to use and yesterday I worked on creating my own design in EQ.  Of course I didn't create blocks that have never been used before, but I put some existing blocks together and came up with my design.  This is the center block... an Ohio Star, and it is 24" square.  There will be a white border around this block and then there will be flying geese all around, and another white border.  We did not buy fabric for the backing, so that is still another decision I will make once I get to that stage of the project.

My Country Cousins quilt is in its final stage, the hand quilting of the border.  The four borders have all been hand appliqued, but the quilt-as-you-go is going to take a bit of time, as I am echoing all of the elements, and that is a slow process.  The trick will be when I get to the point of attaching the borders with the QAYG technique that I used to join the twelve blocks of the quilt.  I'm not convinced I know just how that will go, but I am confident it will work out fine.

Thursday, August 4, 2011

Momentos from the cabin

Our cabin in the mountains will be a fond memory for many years to come. Not going there anymore will seem strange, but I have many momentos.  Actually we brought alot of "things" back home, and have found uses for a few.  Like the "garage art" that used to hang over our beautiful stone fireplace.  I didn't want to fold it up and leave it in a stack somewhere, so I decided to hang it where no one can get real close to critique it.  It was a quilt I made when I was still just a seamstress.  Probably the last one before I jumped head first into real quilting.  On this quilt I did some hand embroidery, some fusible applique, then pieced the border.  Didn't know I made bear paw cornerstones at the time... it was just a block that fit the theme.  I hand quilted in a few places and used a fancy stitch to machine stitch lines in the outside border.  I had no clue how a binding was supposed to be sewn on.  There was no real plan, it just kind of came together as I progressed along. This quilt is suspended so that you can walk under it without hitting your head.  Our garage is almost two stories high.


One of the bigger items to come back with us is my  cutting table.  It folds up pretty compact, but it still needs to be stored somewhere.  Well last week we found a use for this table. We sometimes enjoy putting puzzles together, but it requires a big table space and you have to be able to cover it up or move it because they typically take several days to put together.  When we first thought to bring it in to temporarily set it up in front of the fireplace we were trying to figure out how we could cover the puzzle in progress so that the cats don't walk all over it and lose the pieces.  I just happened to have an extension for my design board that folds up so I can put it away when I don't need it.  It is flannel covered coraplast board that is 24" by 48" when folded (it has a hinge) and opens up to 8' long... so that means we open it up and spread out the pieces, then when we are done for the evening... close the top down over the puzzle.  The added bonus to this setup is... I'm not going to load it up with stuff like my cutting table gets loaded, so when I want to pin something or have an open table to spread something out... my closed puzzle cover works great.

We even brought back a puzzle we had bought about 10 years ago that we never opened out at the cabin.  The bag inside is sealed and it looks like brand new.  It has 1,000 pieces and the picture on the box is pretty obscure, and there is no picture inside the box, so it looked very intimidating... the reason we never opened it.  My husband did a search online and found the puzzle is selling on eBay for a pretty good price.  I think we have decided that is the best thing for us to do.  It's called Buried Blueprints, and they are definitely buried.  We could probably buy a couple puzzles that we could complete for the price we could sell this one that would be too frustrating.  Puzzles are supposed to be a fun past-time.

Friday, July 29, 2011

Pillowcase Day

A while back my Monday quilt group made pillowcases that we donated to the Air Force Hospital here in San Antonio.  The lady that is our contact recently asked if we were thinking of doing it again anytime soon.  We kind of have an open agenda on Monday... pretty much everyone works on their own project unless someone comes up with something that we need to do as a joint effort.  Our group is not just quilters, we have some ladies come that knit or crochet, or do other crafty things... but sometimes just visiting with everyone is all that is accomplished.  When we make pillowcases, everyone can get into the works.  There is cutting and pinning and ironing, so those who don't sew can feel that they have contributed.  Someone has to take them home and wash them and bag them.  So if we make lots of pillowcases it becomes a fun time for everyone.  This Monday is designated as "pillowcase day".

With all that said, I decided today that I would make a pillowcase to freshen up my pillowcase making skills.  One of my grand-daughters has a birthday coming up and I thought I would make her a pillowcase.  I figure that she might have a reason to take her pillow along to a slumber party or on vacation, so I put her name on the trim.  I didn't want it to be too obvious that her grandmother made it, so I concealed my signature on the inside of the trim.
Today was our day to head into the big city.  We didn't stop in the city, but headed through and continued on to Castroville to one of our favorite little restaurants.  There is also a really great bakery in town and a wonderful quilt shop.  I found a perfect piece of fabric for the border on the quilt I am working on from the $5 quilt class I'm in the middle of at another quilt shop in SA.  The quilt is an on-going 6 month project, and 99% batiks, but I can see the end and there was a table of batiks for 50% off.  The stripe colors were just perfect.  I was very pleased that I just happened to find that piece of fabric.  I will be sure to post a picture of this quilt once it is complete.
I'm sneaking up on the completion of the borders for my Baltimore Country Cousins quilt.  That will be such an awesome quilt when it is done.  I'm not getting too excited about it yet... it's hard to say what could get in the way of getting it done... but I'm real convinced I can get it done soon.